
Instead of paying up to $100 at a store for Christmas decorations, why not make your own? Let’s spice up our home with two different decorations made with supplies and love!
To make a custom wood sign of your choice you will need these products:
- Round Wood Sign
- Tape
- Paint + Paint Brushes
- The decals, “Merry Christmas”
- Transfer Tape
- The Cricut Tools
- Hot glue gun
- Dollar Tree Bow
- Dollar Tree Flowers & Acorns Arrangement
To get started you will need to put tape down in the middle or to which ever length you will like to divide the circle into two sides. Once the tape is pressed firmly
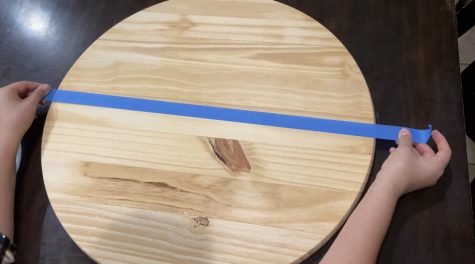
to make sure it will not move you start to paint either side.
While painting why not ask one of your friends or siblings to help you out. Christmas is about making memories, and creating joy, do the same while making the sign!
After putting two or three coats of paint on each side of the circle, start to take off the tape to continue with the “Merry Christmas” decals.
To make sure that the decal sticks onto the wood sign, scrub the transfer tape onto it to m

ake it sticks. Once it sticks to the wood sign, lightly scrub it and slowly peel the transfer tape outwards.
Now onto the pops of color, with the bow, flowers and acorns.
Firstly, lets start with the bow by adding hot glue to the back of it and pressing down firmly on it to make sure it glues down to the wood. Once that is done we add the plants. When adding the flowers, acorns etc we have to make sure the ends are not seen. So by doing that we can just hide under to bow!
Once done adding all of the mini decorations, this would be your final result to your Round Wood “Merry Christmas” sign.
How exciting, Christmas is almost here. Let’s make a Christmas Countdown!
For this DIY you will need:
- A plate
- Clip Back Pins
- Decals “Days Until Christmas”
- Number Stickers
- Transfer Tape
- Cricut Tools
- Hot Glue Gun
Firslty, lets get out our two clip back pins, and also cut out the correct number we need for the countdown.
To transfer each decal onto the plate, we need to use
transfer tape to be able to do that. So let lightly scrub the transfer onto the decal to make sure it sticks to it. Once that is done we place onto the place. When it is placed where desired, slowly scrub and pull away.
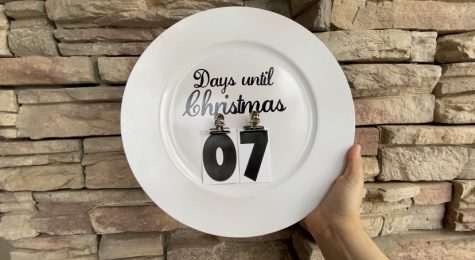
Now to had the clip back pins we hot glue the back of it so it can stick onto the plate. When the glue is cool downed add the number stickers and clip it!
Once all those steps are done, you are finished, and have a Christmas Countdown!